by Boris Pavelic
 It's been a year now since I have started Ruth Stout's deep mulching method in the UK and I can say, based on this short experience, that I am very happy with the results.
If you have read my previous posts, then you may remember that I struggled with weed control, due to my busy life and have decided to start mulching again. I have done this method before but in a different and dry climate.
Before starting here in the UK, I asked a lot of people their opinions but all of them told me not to do it because the method might encourage slugs to reproduce more. Without any disrespect, no one of them had tried this method, so I simply couldn't take the advice. I thought if each slug can lay let's say 20 eggs, why it should it be able to lay more eggs because of the presence of mulch? Annoyed and anxious about my untidy allotment, I ordered 20 bales of straw, and clearly stated that I am ready to fail with this attempt.
In November 2020, I applied some manure on top of the soil and covered the plot with a thick layer of loose straw (approx. 14 inches). Over the winter, the mulch got compact and ready for the new season.
Observations about weeds
The next year, the mulch has reduced at least 80% of the weeds. There are a few species that will protrude through the mulch, but they can simply be pulled out and left on top of the mulch to dry out. Those are Couch grass, Bindweed, Silverweed, Dock, Blackberries, Horsetail. These weeds are easy to pull out, as the soil below the mulch is always humid and loose. It never cracks, as it never dries out. The rest of the plot was weed-free, as the mulch layer was thick enough.
I have seen a few weeds growing around the main cultures (courgettes), as that small local area is not under the mulch. But based on the fact that at least 80% of the weeds were successfully managed, those few didn't bother me at all.
Slugs
I was obviously very anxious about the slugs, as everyone was against this method. Experience in the first year shows different and encouraging results. We had slugs in the first year of mulching but not more than without mulch. In my opinion, the mulch works well with slugs because during warm weather the mulch is dry and sharp, which makes the surface inadequate or more difficult for them to travel. Also, as they have a good shelter to hide during the day, it is possible to simply lift the mulch at any time and collect them.
Without mulch, slugs dig into the soil and collecting them before the night is not possible. Also, I have noticed that certain species are grouping under the mulch, are they social beings? You can also easily install the beer traps but don't forget to put a wooden stick in so the insects can get out.
Unfortunately, this method is not suitable for using nematodes, which I found very helpful in slug management. If we take the nematodes out of the equation (the simplest method that I have tried but can be pricy for bigger plots/areas), overall slugs management throughout the year should consist of simply picking them up whenever you are in the garden. Eggs are easy to find below the mulch as well, and they shouldn't be mistaken with earthworms’ eggs. I have also noticed that slugs adore dogs’ dry food, which is an excellent attractant. Simply put a few heaps of dry biscuits around the plot and collect the slugs before you go home.
Wildlife
Mulch provides a great shelter for small wildlife, so I have seen beetles, centipedes, crustaceans, spiders, and a lot of earthworms breaking down the mulch. All those small animals were attracted by the humidity, shelter, and continuous food supply - prey. People say this method might attract mice and rats but I haven't seen any on my plot.
Nitrogen
We know how Nitrogen is important for plants' health. Straw contains more carbon than nitrogen, so to ensure a continuous supply of Nitrogen, I use liquid Comfrey (Bocking 14) fertilizer and manure dug into the soil, just below the roots of the plant. By using the manure this way, I need less of it and each plant gets more. Make sure that the manure is well rotted, otherwise it might “burn” the plant. Green biomaterials will usually contain more Nitrogen, so grass clippings and other green “waste” should be added on top of mulch whenever possible. As I have quite a lot of comfrey plants, I cut the leaves maybe twice per year and scatter them around the plot, on top of the mulch.
Planting in deep mulch
The most common question is how vegetables can grow if weeds can't? Well, we ensure good conditions for the vegetables and remove the mulch locally. So, when planting young plants, I simply remove the mulch locally and plant the seedlings. Then, put the mulch back when the plants are well established but leave a few inches of air between the mulch and stems. This is to prevent stem's direct contact with humidity, slugs, and potential pathogens. If you are planting very small plants or seeds, I'd recommend you remove mulch from that area and put it back when plants grow bigger.
If you have high plants, such as raspberries or runner beans, simply add more mulch and forget weeding and watering through the year. If the soil is not wet enough before you apply thick mulch, water beforehand.
Materials used for mulch
I use any materials that will decompose, except cardboard (it contains glue and printing paint), materials contaminated with chemicals (this is difficult to control, as for some materials I don't know what they have been through), and unsuitable plants for mulching (such as walnut, oak, laurel leaves).
Predominantly, I use straw bales and I tend to find bales that local farmers can't use (anything moldy, wet, dirty, or old will be great as mulch). Also, I add leaves, woodturning shavings (your local turners will be happy to get rid of shavings), branches, woodchip, any green waste from the allotment. I am looking to buy a second-hand garden shredder, so I can take the green waste from my neighbors and use it as a free mulch too.
There are theories that wood chipping will use Nitrogen to decompose but there is enough scientific data available confirming that only the nitrogen on top of the soil might be affected. Bacteria need Nitrogen to decompose thick wooden pieces, so never dig those into the soil. Woodchip decomposes much slower than straw, which is another benefit to using it when possible. Also, there are recommendations saying that woodchip should be kept in a composting bin for up to 6 months before moving onto the garden. I have never mulched with woodchip only, so can't comment on this. But the amount of it I use on my mulch doesn't raise any concerns.
You can use plastic sheets as well but then you lack all the benefits mentioned above and the black plastic doesn't look as nice.
Problems I faced in 2020
The first one that pops into my mind is that I didn't have enough mulch! 20 bales was just enough. Another 7 or 8 would do a job perfectly fine. I have noticed that mulch was getting thin through the season and some weeds were poking through quicker than I'd have liked them to.
Another problem is mulch supply. This is the time of the year when I am looking for another 30 old bales, and I think that continuous supply throughout the year would take this stress away. I can simply buy new bales, but that's expensive and those should rather be used as bedding for livestock.
The overall conclusion is that the method works well, based on one season experience. The plants were strong and healthy, the amount of work and watering was massively reduced. As mulch continuously decomposes, there is no need for buying a big load of manure and scattering it around the plot. If you use manure just where it's needed, you will need only a few bags of compost, which reduces the amount of work needed, and keeps the cost down.
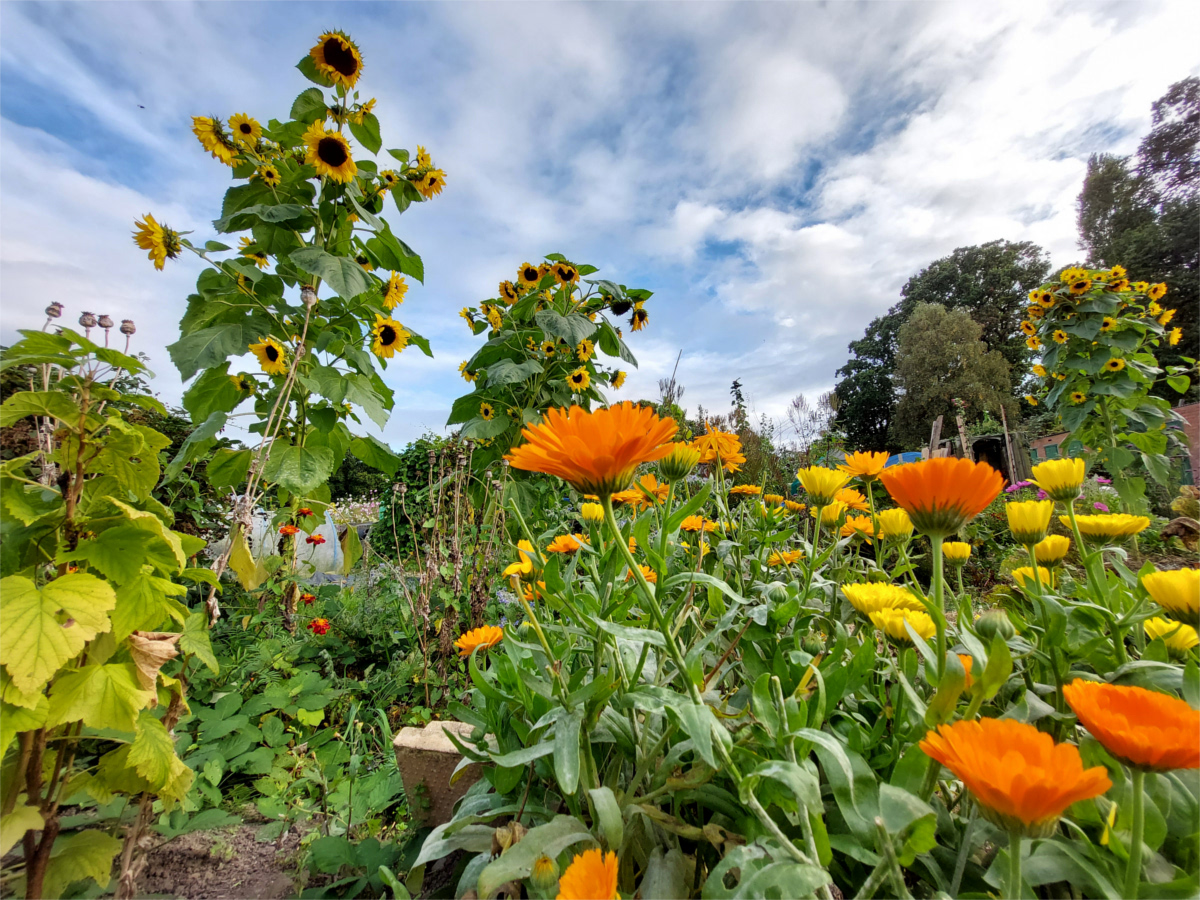
I haven't noticed any problems with slugs (other than the usual problems they cause, but nothing more), no rats, fewer weeds, the plot isn't over wet, or soil too cold. The mulch did a really good job and I think the photos evidence that.
The Permaculture Association's interactive self-study course will make you confident in turning small spaces into highly abundant food gardens
 Learn how to apply regenerative practices and permaculture techniques to design and grow a garden that optimises the time and energy you put in, in order to produce high yields of delicious, nutritious food.
Most of our testers valued this course at between £70-£100, but, in line with our charity’s aims we want to reach as many people as possible with permaculture. This course has the potential to really empower people from all walks of life in using regenerative thinking and design with practical results - nutritious home grown food. You’ll also save money as you grow food.
View course.