 We know we need to plant more trees, that’s a given. However the planting method you use will depend where and what kind of tree you are planting. The process that Aranya uses at home takes around an hour, and in this blog he explains how to give your fruit tree the best chance.
Why bare root?
Bare-root trees have the limitation of only being able to be planted in the winter, when the tree is dormant, whereas potted trees can be planted at any time of the year. However, you’ve much more choice of varieties and rootstocks (sizes) with bare-root trees and they’re much cheaper. This is because trees grown in pots need constant attention and potting on each year. Trees grown in the ground are usually planted on a field scale, with much less maintenance required.
Which root stock should I choose?
The code ‘M25’ doesn’t let you know the motorway the tree was transported along, rather it tells you the rootstock the variety was grafted onto. The root-stock is the part below the graft and determines many of the tree's qualities, including the size.
You’ll need to decide how much space you have for planting. Choose a low vigour ‘dwarfing’ rootstock for a small area, ‘semi-dwarfing’ for an espalier, or ‘half standard’ if you have plenty of space. Half standard trees are used in orchards grazed by sheep, whereas full standards are used in orchards that also function as cow pasture.
Choosing a flowering group
The flowering group is another important factor when choosing your tree. While a few fruit trees might be labelled ‘self-fertile’ many rely on cross-pollination with a different variety. There are five flowering groups (A to E or 1 to 5) and you’ll need to choose at least two trees that flower at the same time, or have adjacent flowering groups. For example, if you have a tree with flowering group C, you’d need another tree close-by, with flowering group C, B or D. If there are already fruit trees of the same type nearby, they may be able to offer pollen, but you’ll need to know what flowering group they are. If you don’t, just wait until the existing tree is in flower and then go to the garden centre. Have a look at the labels of the trees there also in flower and that should tell you the flowering group letter (or number). The only downside of this method is that it’ll be spring and you’ll only be able to buy potted trees at that time.
If you are living in an area that’s especially windy (high altitude) or with a strong likelihood of late frost (a valley bottom), choose later flowering varieties (D or E) for the best chance of pollination.
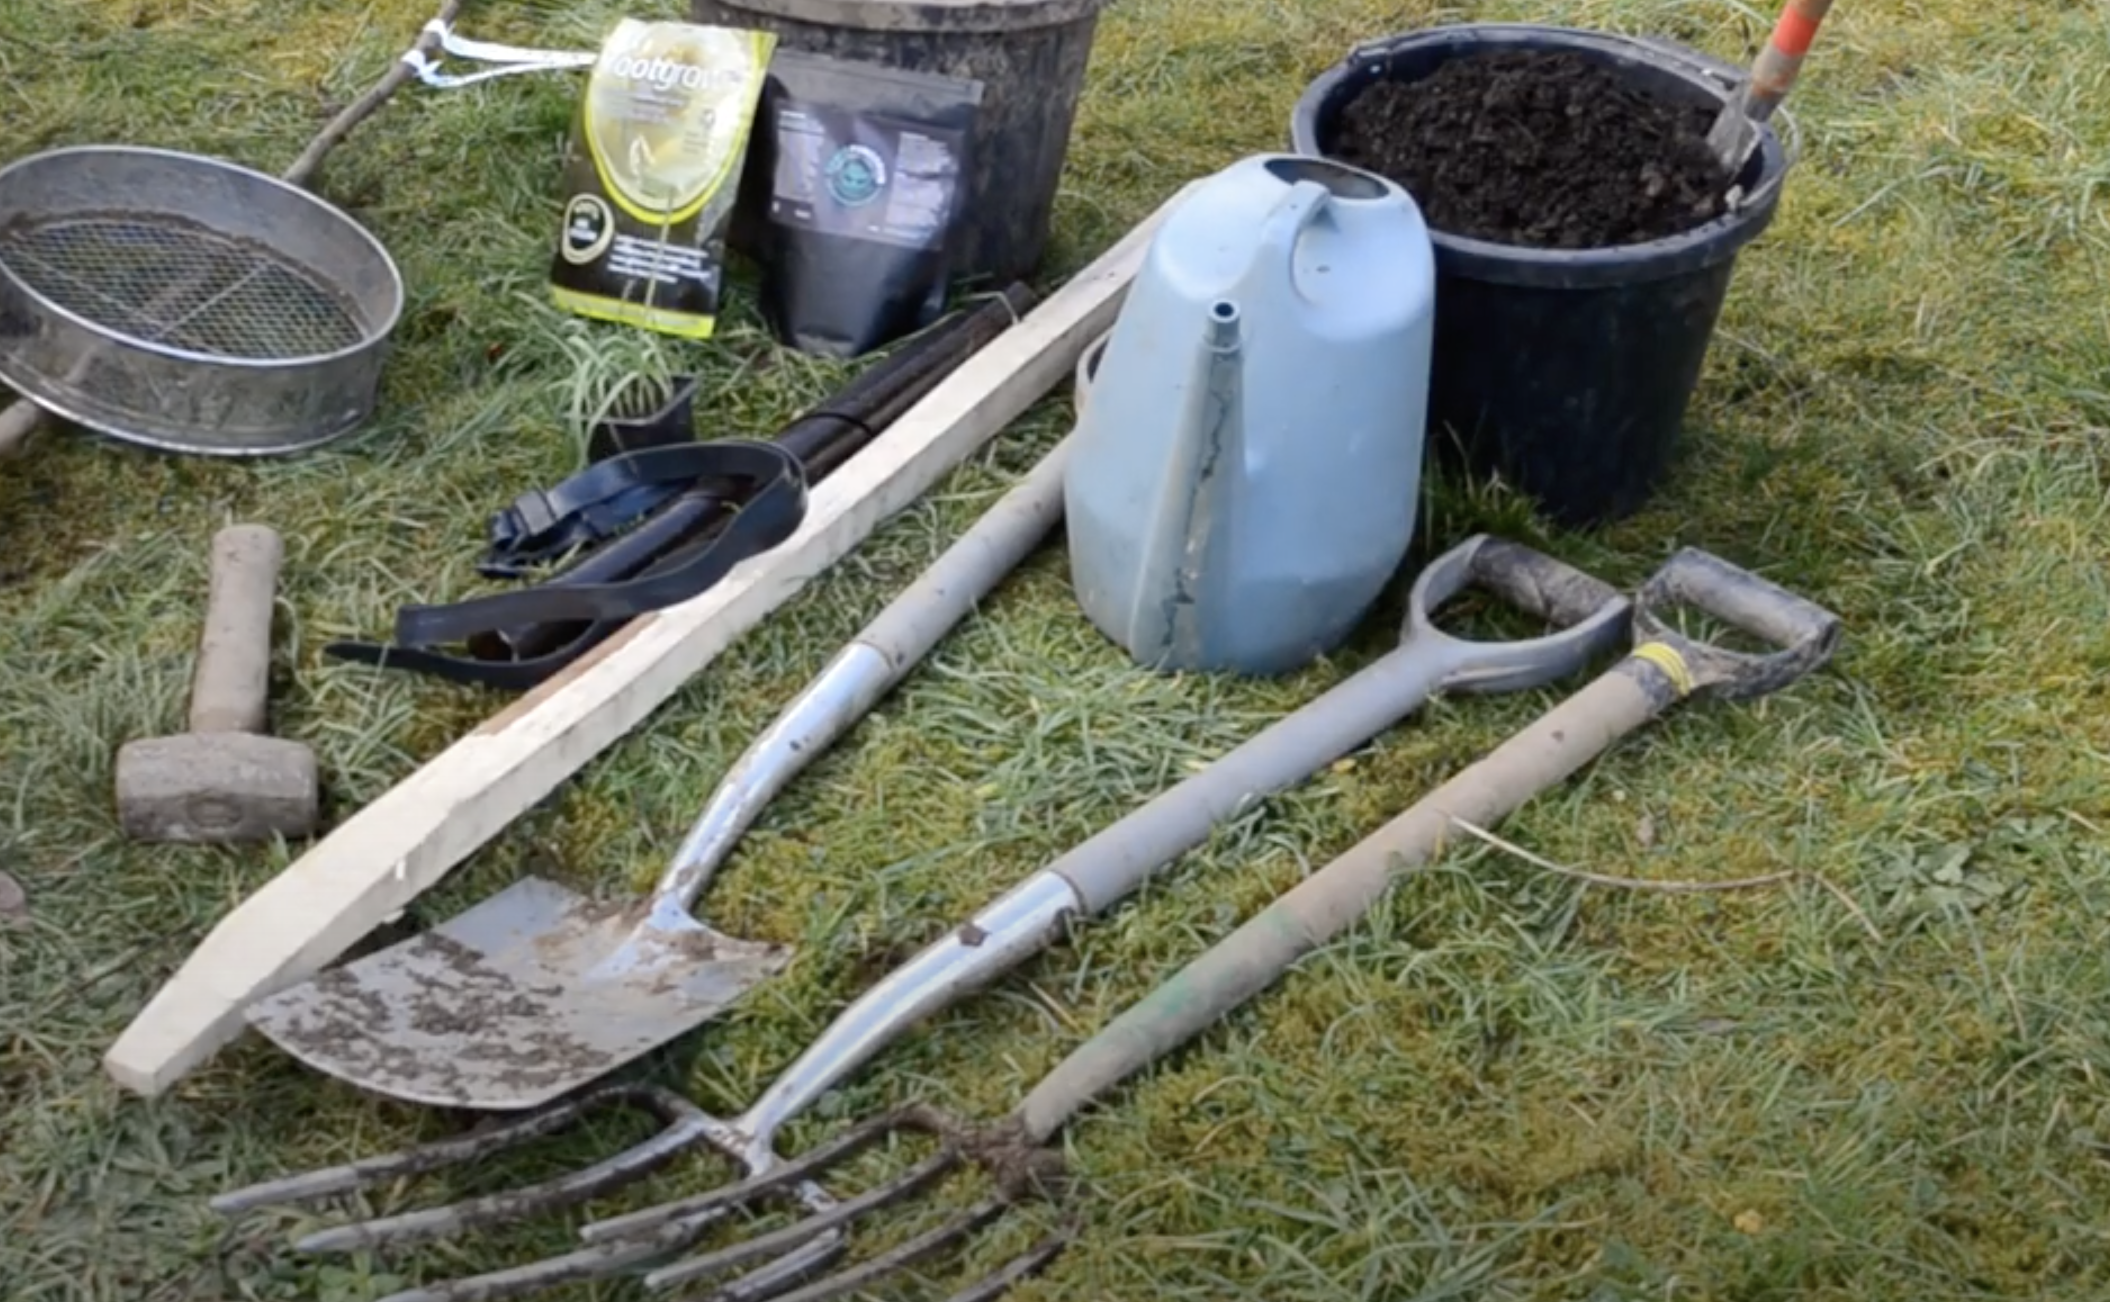 What you will need
Bare-root tree
Spade / fork
Soil sieve and bucket (depending on your soil this will be useful to sieve out larger items)
A little topsoil and compost mix
Tree stake and buckle ties
Lump hammer
Spiral tree guard (not-transparent)
Mycorrhizal fungi inoculant or pre-inoculated perennial Allium (e.g. chives, garlic chives).
Mulching materials
Choosing your stake
When choosing your stake make sure you it is around 2/3 size of the tree. Sweet chestnut is a good choice as its high tannin content means it doesn’t require any preservatives to prevent it rotting, especially if it has been harvested in the winter months when it contains little sap.
Smaller rootstocks will need staking for longer than larger rootstocks and dwarfing trees will need staking for life. Choose a stake that’s going to last.
Getting the right compost mix
A mix of topsoil with compost is best. Pure compost will feed the tree well, but we want to encourage roots to reach out to find nutrients in the surrounding soil, ensuring the tree is firmly anchored and has a better chance of survival in the future.
Prepare a companion plant
A pre-inoculated companion plant will give the tree a mycorrhizal partner with a sugar source, allowing the fungi to thrive and reach out to the tree roots. It’s not a necessary part of the process, but is certainly best practice. We like perennial alliums.
Step 1 - Prepare the tree
Any bare root trees should spend minimal time out of the ground. Once yours arrives, make a note of the level of soil on the trunk (the depth at which it was previously planted) and mark it with tape or similar, you’ll need to know this later. Then heel it in at the same depth, that is dig a hole and get the roots into the ground to stop them drying out. Anywhere you have sand or loose soil will be fine. The tree can be laying at an angle. This is just temporary, but aim to plant the tree soon. On the day of planting, soak the roots in water for a few hours. Then check the roots themselves. Prune off any damage.
Step 2 - Dig a hole
Dig your hole so that the tree roots fit in comfortably. Make sure you remove any large rocks and stones from the hole before planting your tree. A square hole is best in clay soil as the roots can penetrate at the corners and anchor into the surrounding soil. If you’re planting into heavy clay, dig a larger hole and incorporate more topsoil and compost. Sieve out any big, sharp stones, but retain the rest of the soil for later.
Step 3 - Staking the tree
Properly staking your tree will give it the best chance of establishing.
Position the tree with the stake vertical and as close as possible to the stem with the stake on the windward side. This will avoid the tree rubbing on the stake in strong winds.
When fully hammered in, the stake wants to be around a third of the tree’s height. We want to allow the top two thirds of the tree to flex in the wind - this movement encourages the tree to grow more roots.
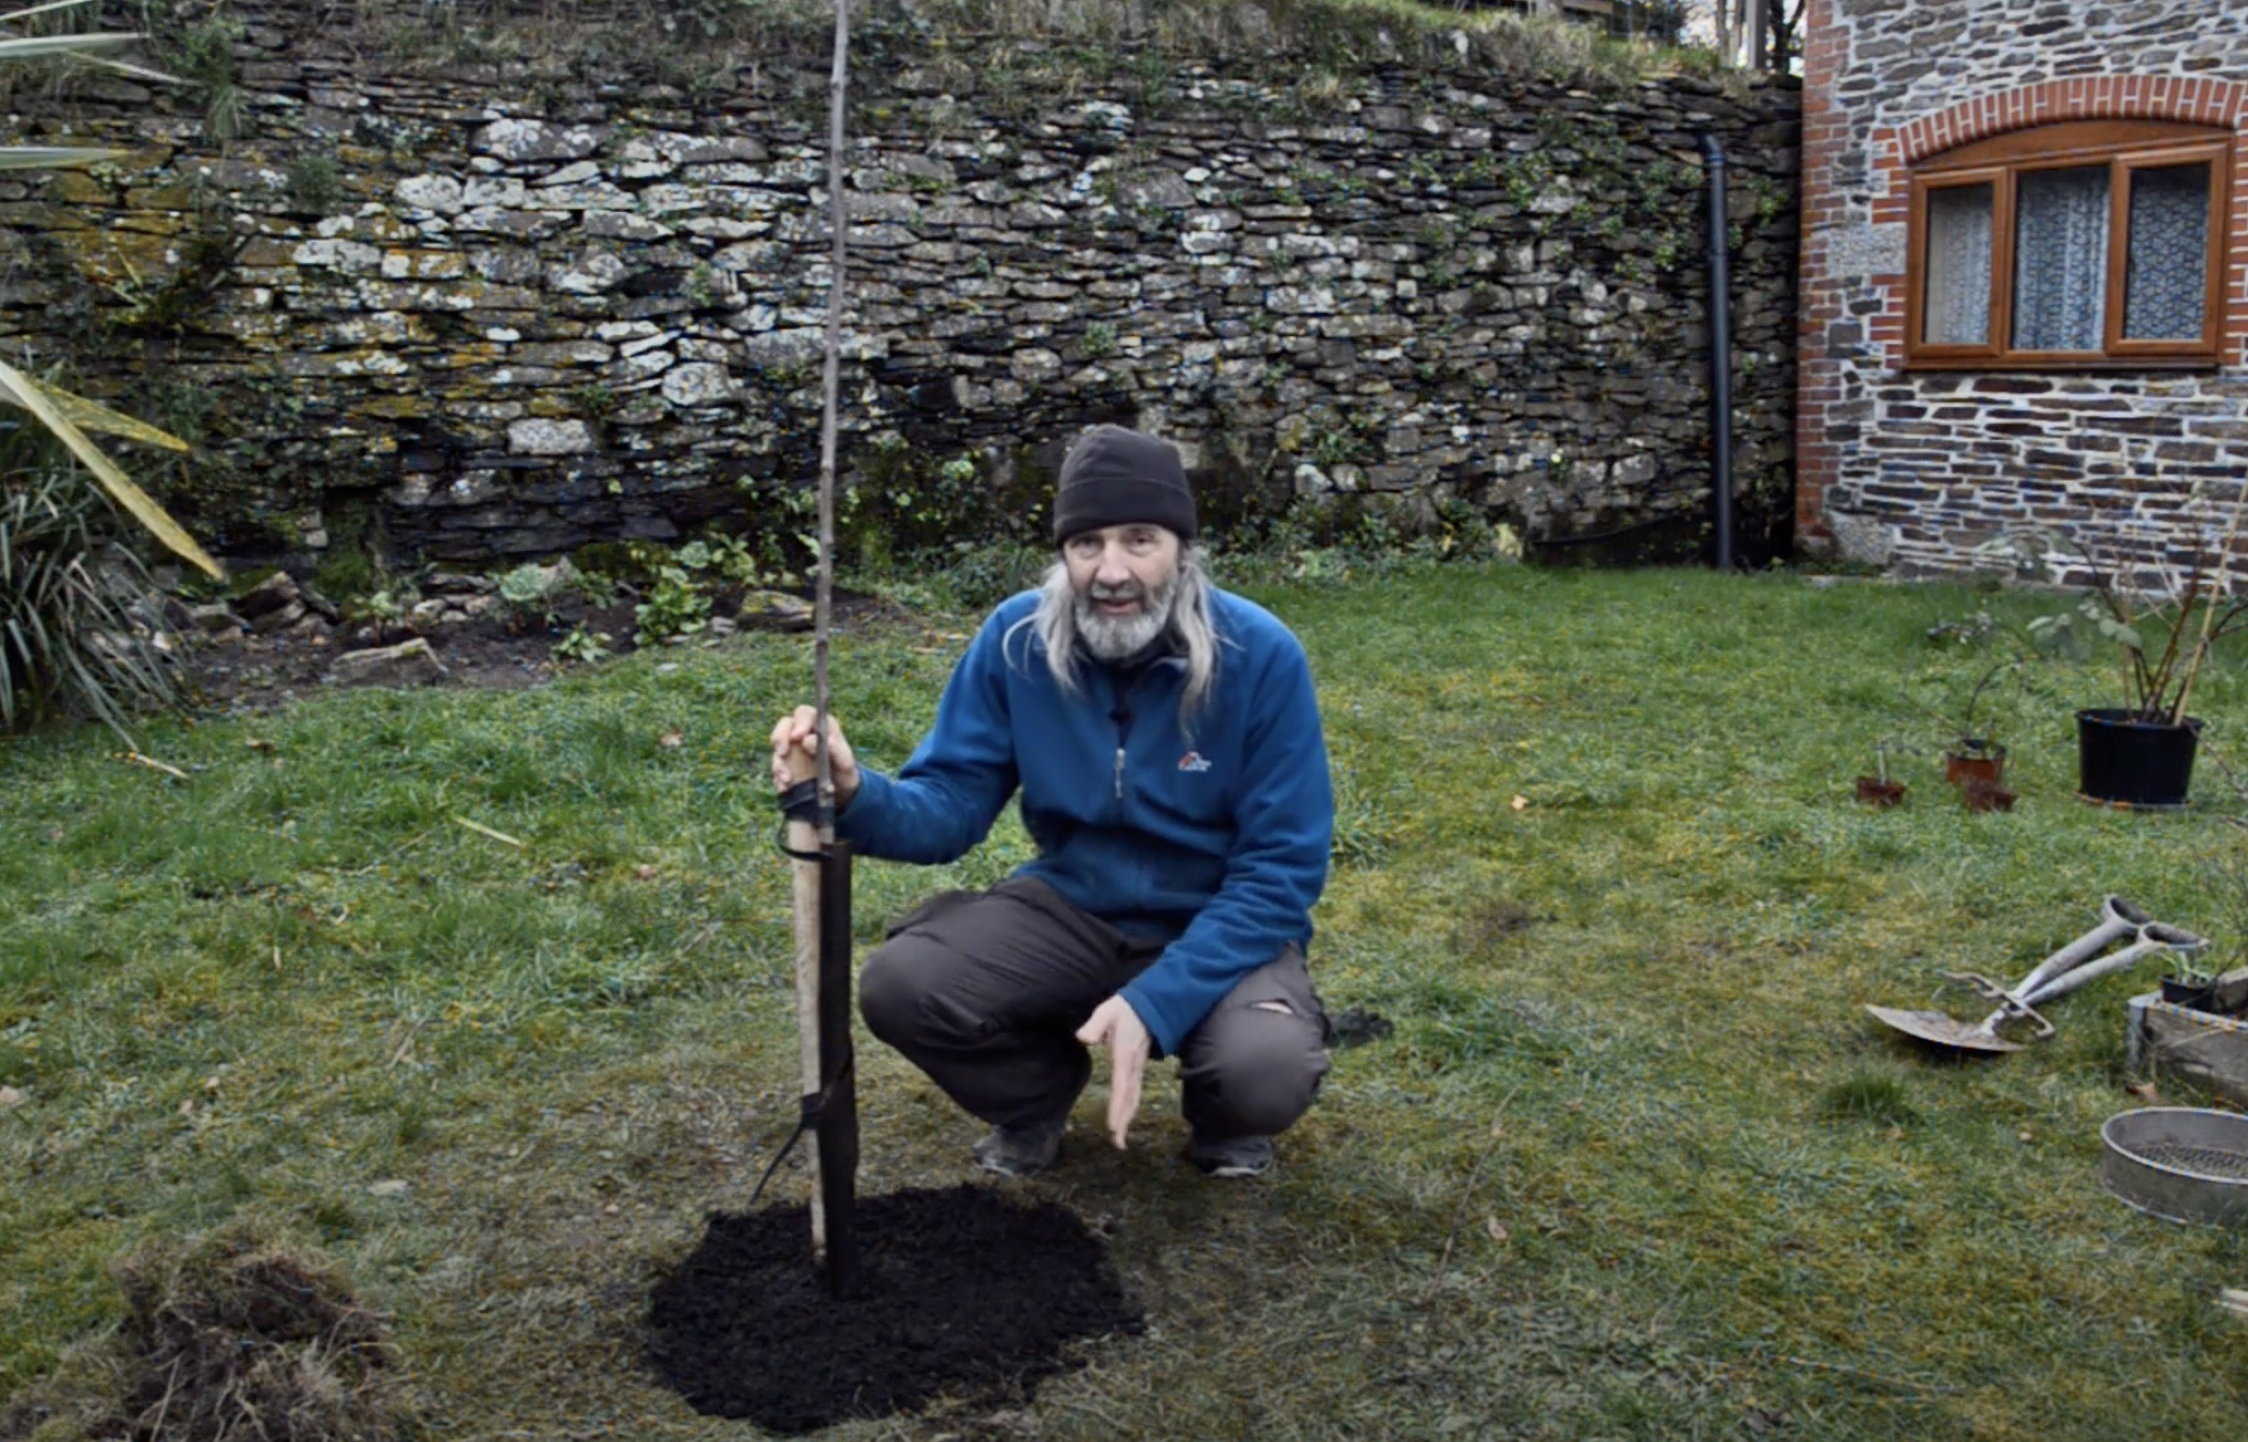
Once you know where you need the stake to be, set the tree down to one side, position the stake and give it a good whack with the lump hammer. Mind your fingers! We use an old paint can to prevent us chipping bits off the top of the stake, damage that will allow water ingress and lead to early rotting.
Step 4 - Planting the tree
Identify the level at which your tree was previously planted - you want to ensure you replant it at the same depth. The bark above the soil has different properties to the bark below. You can use a piece of wood across the hole to line it up.
If you don’t have a pre-inoculated Allium, sprinkle some mycorrhizal inoculant onto the moistened roots and in the bottom of the planting hole.
Once you’ve lined up your tree in its final position, slowly add in your topsoil and compost mix around the roots, gently agitating the tree to ensure the soil fills in all the gaps. We don’t want to leave any air pockets. As you add soil, keep checking that the tree is still at the correct depth. I tend to keep it a little high, knowing that when I firm it in it’ll sink a little. If you have a pre-inoculated Allium, plant it close to the trunk, in a space between roots. Use some of the original soil to finish off. Firm the soil around the tree with your foot, using your body weight, but not stamping.
Step 5 - Secure the tree
Attach the tree to the stake using at least two buckle ties, one near the base and one close to the top. A third tie can be used if you need to straighten the tree to prevent it rubbing the stake in the middle. Put each tie around the tree first, run it through the spacer and then buckle it on the other side of the stake. Tighten the ties properly. Their purpose is to hold the root ball firmly in place so that new fragile roots don’t get broken off when the tree moves in the wind. Loose is useless. There’s some room for stretch built into the ties, so buckle them firmly. At the end of each year check them and loosen them if necessary, but start with them tight!
And be careful not to damage any of the buds when securing the tree.
Step 6 - Mulch around the tree
Once the hole has been filled, mulch the area about one metre around the tree to prevent competition from grass or other competitive plants. Use whatever you have available, but we prefer organic materials as they break down and feed the tree. Our trees are mulched with cardboard, compost and seaweed as we have access to all three. Woodchip would be another good option.
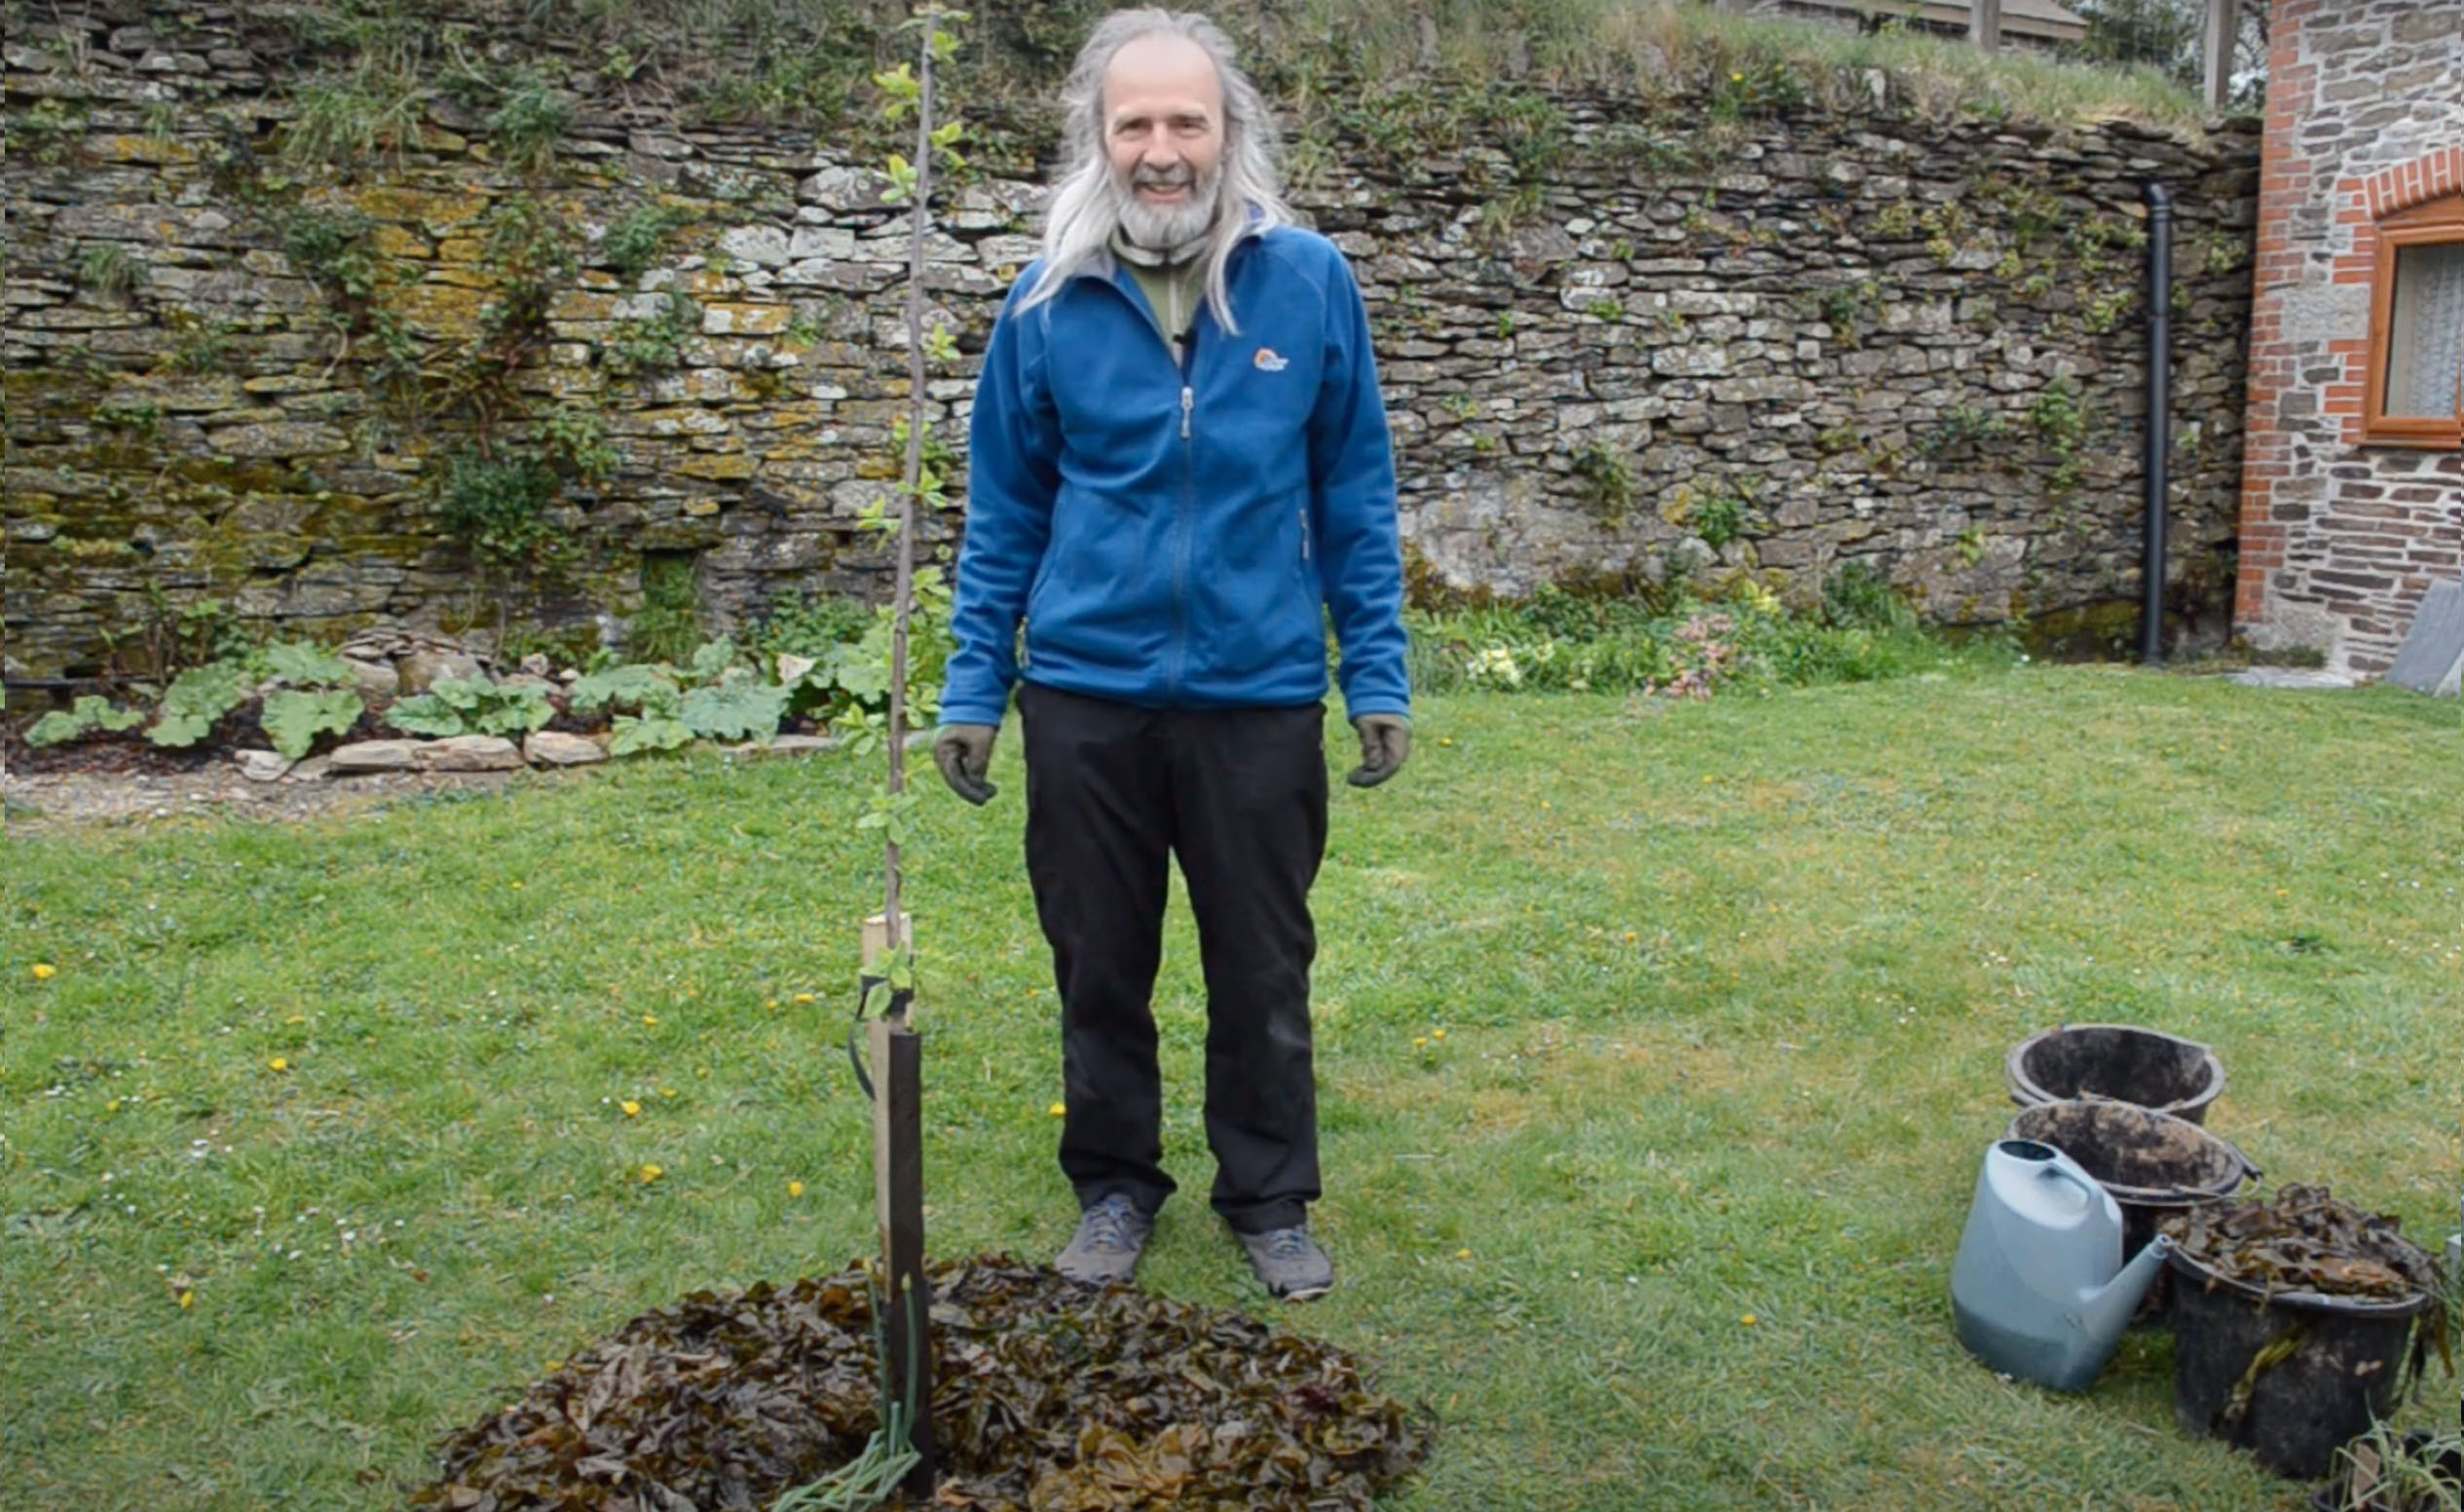
Step 7 - Protect your tree
Add your spiral tree guard - these can be threaded between the tree and the stake and around the ties. This is an essential step in areas that aren’t protected from rabbits and other animals who might be desperate enough to nibble the bark in the winter months. Remove the guards in the spring as ants like to make nests inside them, but make a note to put them back again the following autumn. After a few years the bark will be thick enough to protect itself. Each autumn check the tightness of the ties - they have some flexibility, but may need loosening a little each year. Not too loose though!
A variety fruit tree is a gift from our ancestors to ourselves, our family and future generations, following this process will help give your tree the best chance of success at planting time.
Siting a fruit tree from Learn Permaculture on Vimeo.
For more tips like this, and a step-by-step method to designing your permaculture garden, join Aranya’s Design Your Site with Permaculture Course. Permaculture Association members enjoy a 30% discount - see the members area for details.